8 DIY Science Exhibition Projects
DIY Science projects are particularly popular among teens and youngsters, they are not only helpful in making children understand about various scientific phenomenon but the theories, concepts and applications related to it. Following activities have been most inspiring and exciting during Online STEM Camp 2020 for the children of age 9-15. Hundreds of participants across country completed these thrilling and worth learning projects throughout various batches of Online STEM camp with PSC Inventor Kit which is still available at Sciencestore.pk
P.S: Adult supervision is necessary for kids to use Glue gun, super glue etc.
Below is the list of exciting activities for teens,
- Salt Water Battery
- Solar Lantern
- Dark Sensor
- Solar Oven
- Water Rocket
- Glider
- Hydraulic Scissor Lift
- Vertical Axis Wind Turbine
Project #1 Salt Water Battery
Introduction
An interesting project to understand one of the oldest concepts of generating and storing electricity by using saltwater solutions with different metals.
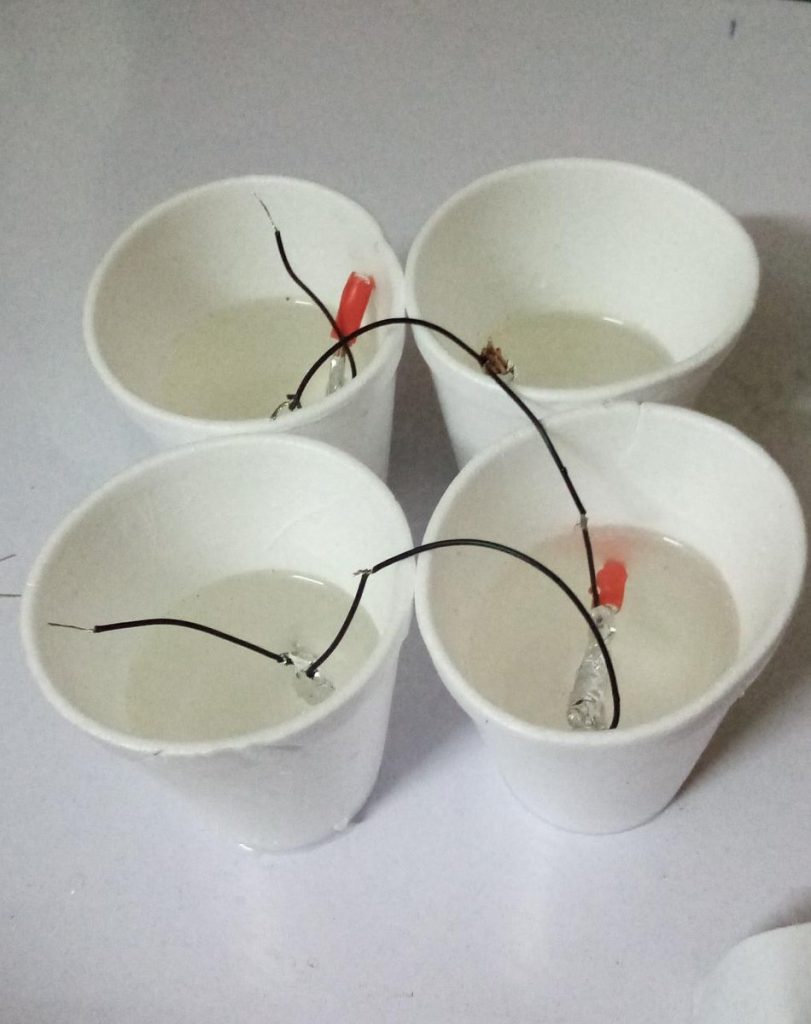
Materials and Tools Needed to make Salt Water
- 4 Disposable Cups
- Copper thick wire (4 pieces, 3 inches each)
- Aluminum tape
- Saltwater
- Connecting wire 1 ft
- LED
- Scissors
- Pliers / Box knife
- Multi-meter

Making of Salt Water Battery
- Take copper wire pieces, leaving one centimeter from either end, remove the remaining outer plastic coating with the help of pliers/box knife or scissors, this will make an electrode.
- Cut 4 pieces of aluminum tape as long as the cup and stick to the inner wall of each cup so that tape reaches the outer edge of the cup, this will be the second electrode.
- Cut 4 pieces of connecting wire (3-4 inches long) and peel 1-2 cm from both ends.
- Join one end of each connecting wire with copper wire and other with the edge of the cup such that the wire is on the aluminum tape
- Pour saltwater in all cups equally
- Put alternate copper electrodes in disposable cups, make sure that both electrodes do not touch each other
- Connect the LED in the series to the remaining ends of the first and last cup.
- If it does not glow, swap the legs of the LED and try again.
- If the battery is not working then check the voltage using a multimeter.


Watch Video Tutorial of Salt Water Battery
Project # 2 Solar Lantern
What is Solar Lantern? or Rechargeable Solar Light?
A fun-filled exciting DIY project to explore solar energy, the students will understand how they can use sunlight to make a lantern and benefit themselves during electricity shutdown. The hands-on activity helps students to learn about renewable energy sources, solar panels, its working, and applications for the household.

Material and Tools required for making Solar Lantern
- 1-watt small Solar Panel
- Cardboard sheet 1 ft square
- 3.7-volt rechargeable cell
- Small LED panel
- Connecting wire (2 ft)
- Switch
- Template for box making
- Scissors
- Box knife
- Soldering iron
- Hot Glue gun
- Tape
- Multi-meter
How to make Solar Lantern?
- Using cardboard, make the hollow box/frame leaving both sides open according to the template.
- Cut two triangular sides (given in template) and keep aside for later use.
- Cut 8 pieces of connecting wire each 3 inches long
- Join the pieces of wire with terminals of Solar panel, LED panel, switch and Battery cell (2 pieces each) by soldering
- If terminals are not mentioned on the battery cells, use a multi-meter to check the positive and negative terminal of the battery cell.
- Put the dial of the multimeter on 20V
- Connect the probes of the multimeter to the wires of the battery cell
- If the reading shown is negative then swap the probes
- Upon positive reading, note that to which red probe of the meter is connecting is positive and the other is negative (with black probe).
- For checking the Solar panel, take readings in sunlight.
- Mark the positive and negative terminal on each wire separately by tagging with tape or paper
- Make two holes for passing wires of the solar panel at the center of one side of the box (holes must be apart to each other such that of solar panel)
- Pass the wires of the solar panel through the holes and fix them on the frame wall with a glue gun.
- Similarly, make a hole for the LED panel on the other side and fix it.
- Above the panel, make a slot for the switch and glue it.


Circuit making of Solar Lantern
- Connect the positive terminal of the battery and LED panel with the positive end of the solar panel altogether.
- With the negative terminal of the LED panel, connect any terminal of the switch.
- Join the other end of the switch, negative terminal of both Battery and solar panel together.
- Make sure you make all connections correctly as wrong ones can damage the components.
- Put the battery cell inside the frame and fix it with hot glue.
- Put all the wires inside the box and join the remaining triangular pieces on both sides.
- Your Solar Lantern is now ready.
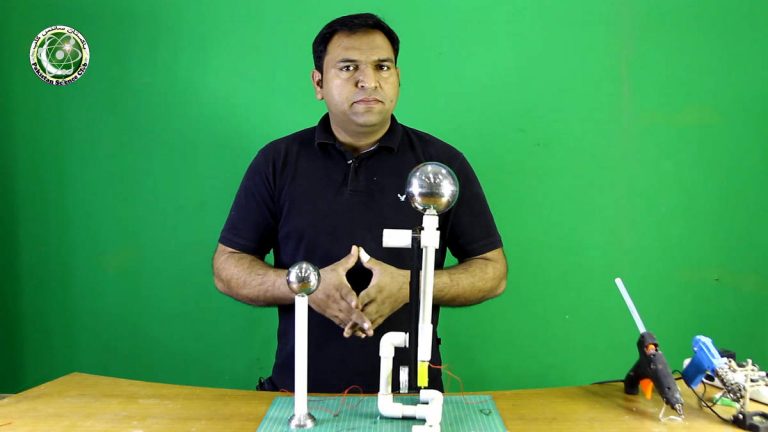
Project # 3 Automatic Street Light
Introduction to Automatic Street Light
An interesting activity to learn about the basic components of electronics and combining some to make a dark sensor for the smart switch, road lights, and many more.

Material and Tools required
- Small breadboard
- Resistor 50K Ohms
- Transistor BC547
- LDR
- LED
- 9V Battery and battery connector
- Glue Gun
- Scissors
Construction of Automatic Street Light
- Insert the legs of the transistor in breadboard such that its flat surface is facing you and the legs are not connected.
- Note that the transistor when facing a flat surface to you has its first leg as “Collector”, the middle is “Base and the last one is “Emitter” from left to right.
- Connect the LED’s negative terminal to the collector of the transistor.
- Connect one end of 50K ohms resistor with the positive terminal of the LED and the other end with a base of the transistor.
- Put LDR in the breadboard such that it’s one terminal should be at the emitter of the transistor and the other at the base.
- Join the positive end of the battery connector with the positive leg of the LED and the negative end of the connector with that of the emitter.
- Fix the battery to the connector and test your project if it working in dark.
- The LED should turn ON in dark and turn OFF in light.
Watch Video Tutorial Easy automatic street light circuit Project for Science Exhibition on Breadboard (in Urdu)
Project # 4 Water Rocket
What is Water Rocket?
A water rocket is an excellent activity for teens to understand aerodynamics, pressure, laws governing it, and applications for daily life.
Material and Tools
- Carbonated bottles with cap (2)
- Piece of plastic file
- Polythene bags
- Scissors
- Electrical tape
- Marker/pencil
- Ruler
- Nozzle and nozzle valve
- Small cycle pump
Steps of Construction for Water Rocket
- To make the nose cone of the rocket, cut and remove the neck of a bottle with a scissor, cut the upper part of the bottle of approximately 3-3.5 inches.
- Fix the nose cone to the rear end of the second pet bottle with the help of tape.
- Fill the polythene bags into the nose cone till it filled to the top.
- Cover the open end of the cone completely with the tape.
- Cut the middle part of the bottle (approximately 4-5 inches which we have already used in making the nose cone) for making a skirt of the rocket.
- Fix the skirt with tape to the other end of the bottle to which the nose cone is attached.
- Now, for making fins of the rocket, make 4 rectangular pieces of 4 * 2 inches from the plastic file.
- On the width make a 1 cm margin on each fin as shown below,
- From the opposite side, mark 1.5 inches and make a diagonal to the width,
- Divide the length of the fin within a 1 cm margin into four equal parts i.e. 1 inch and cut the division up to 1 cm mark and bend the cuts in an alternative manner.
- Stick the fins with tape to the skirt of the rocket equally spaced with the diagonal edge pointing towards the nose cone.
- Your water rocket is now ready.
Steps of Construction for Water Rocket Launcher
Project # 5 Rubber band powered Helicopter
Introduction
Fly above in the sky has always been men’s greatest dream and this project focus on the basic principles to make a helicopter and make it fly high.

Material and Tools needed
- Disposable cup
- Straw
- Rubber band
- Paperclip
- Small beads
- Popsicle stick
- A pair of Scissors
- Paper tape
- Plier
- Thumb pin
Steps of Construction
Take a disposable cup and cut 4 propeller blades out of it, they must be a mirror image of one another in pairs.
Cut two 1.5 inch pieces of popsicle sticks using scissors.
Fix two-propeller wings at both ends of a piece of craft stick in such a way that they should be in opposite direction and slightly tilted.
Fix the other two wings in the same manner and put some elfy in both propellers (note that the orientation of both propellers should be opposite in direction).
Cut the blades of the lower propeller from the end i.e. 1 cm.
Step 02: Making of Propelling Mechanism
- Take a paper clip and with the help of a plier straighten it and at the one end make a hook.
- With the help of a thumb pin, make a hole in the center of the upper propeller. Cut a small piece of 1cm×1cm from the plastic file and make a hole in the center of it.
- Pass the hook from the piece and pass 2 beads and then pass the upper propeller from it, bend it from the upper end and put some elfy in it in such a manner that beads should move freely.
- Tie two rubber bands together to make a chain, pass the rubber band through the straw. Hook one end of the rubber band and pass the lower propeller from the other end.
- Fix the lower end with the help of paper tape.
Project # 6 Solar Oven
What is a Solar Oven?
A worth learning activity to learn about renewable and solar energy, the participants will understand how they can use sunlight to make an oven while integrating mathematical concepts about shapes.

Material and Tools required
- Aluminum sheet (2.5*2ft approximately)
- Transparent sheet (3*2ft approximately)
- PSC kit box or similar cardboard box.
- Scissors
- Double-sided tape
How to Make a Solar Oven?
- Open up the PSC kit box/cardboard box and completely cover the inside with an aluminum sheet using double-sided tape.
- Fix the transparent sheet at one of the outer sides of the box with tape.
- Make the cover out of the transparent sheet by folding its corners as shown,
- The solar oven is now ready to warm your food.
Watch Video Tutorial
Project # 7 Hydraulic Scissor Lift
Introduction
The hydraulic lift is an engaging activity to explore simple machines and mechanisms, the activity also explains hydraulic pressure, Pascal’s principle, its importance and various applications.

Material and Tools
- Hydraulic Scissor Lift kit
- Small screwdriver
- Plier
- Glue gun
Making of Hydraulic Scissor Lift
- To make the hydraulic scissor lift, watch the video tutorial
Project # 8 Vertical Axis Wind Turbine
Introduction to VAWT
An interesting hands-on project to learn about renewable energy and converting wind energy into electrical energy by making a new type of wind turbine.

Material Required
- 1 Bottle
- Two 1×1 ft cardboard sheet
- Pencil
- 6Tongue depressor (alternate: 10 Ice cream sticks)
Project Material available on sciencestore.pk Be A Maker STEM Kit 3.0 https://sciencestore.pk/product/be-a-maker-stem-kit-3-0/