8 Hands-on projects Activities for Kids that will foster Creativity and Innovation
Hands-on projects have always been great amusement and worth learning experience for the kids, following are the some exciting, fun-filled, and concept-building STEM Activities for kids aged 5 – 8 years old to understand and observe various scientific phenomena, laws, and processes with their daily life applications. The activities described are the most popular among children as summer camp projects and hundreds of participants (both students and parents) successfully completed them during various batches of Online STEM camp. The complete Material kit is available in the PSC Science store and is ready to use and fun exploration.
P.S: There should be an adult/Parent/Guardian with children for helping them with difficult tasks like cutting with scissors, Hot glue gun, etc.
Here is the list of amazing STEM Activities for Kids
- Paper Circuit
- Electromagnet
- Vibrating Robot
- Hovercraft
- Air-powered rocket
- Windmill
- Rubber powered gun
- Hydraulic Excavator
Required Tools:
- Hot Glue gun
- Scissors
- Paper cutter
- Safety goggles
Buy online Tool kits for DIY Science Projects All tools in one place! This cool compact toolbox contains very necessary tools for children aged 10 and over. Available on ScienceStore.pk
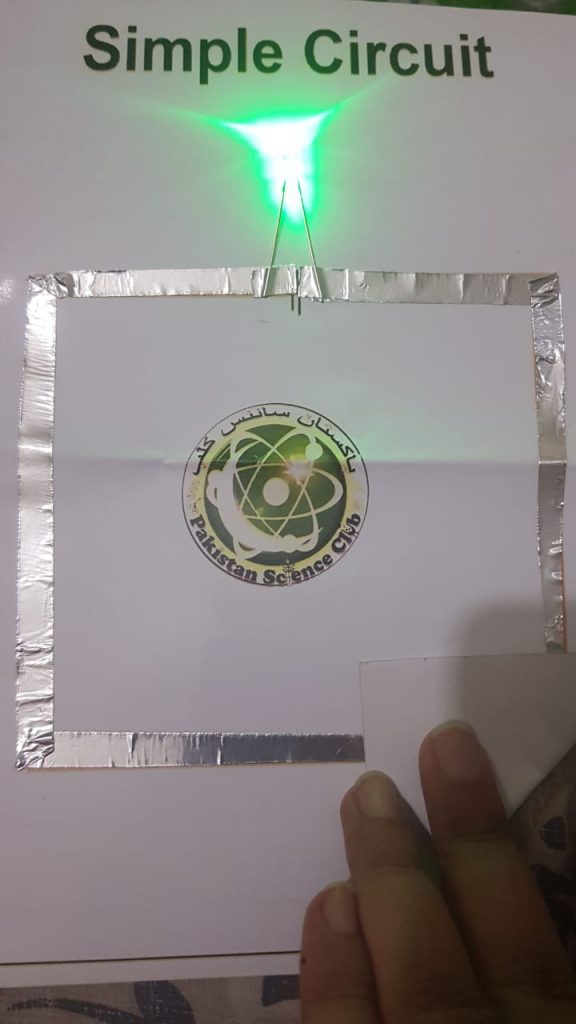
STEM Activity Project # 1 Paper Circuit
What is Paper Circuit
The exciting hands-on project explores the basic concepts of conductor, circuit, and flow of electricity while making interesting objects and characters.
Material and Tools needed for Paper Circuit
- LEDs
- Coin Battery
- Circuit template
- Aluminum tape
- Scissors
The material for this project can buy from sciencestore.pk is also available in Little Scientist STEM Kit 1.0

How to make Paper Circuit?
- Cut the Aluminum tape strips of width 5mm/0.5cm with the help of scissors.
- Take out one end of the aluminum sticker tape about a few millimeters and start sticking it throughout the template
- Try to stick whole without breaking the tape
- Connect the LEDs as per shown on the template
- Remember that the longer leg is positive and the shorter one is negative
Few project picture from an online STEM camp batch6


Watch Video Tutorial of Paper Circuit on Pakistan Science Club YouTube Channel
STEM Activity Project # 2 Electromagnet
What is an Electromagnet?
An electromagnet is one of the most thrilling STEM activities for kids to learn about magnetism, its types, and applications in various appliances by making one for themselves.
Material and Tools required to make Electromagnet
- 3-4 iron nails (3 inches long)
- Copper wire 2 meters long (24-28 gauges)
- Small DC switch
- Connecting wire (2 pieces of 3 inches)
- AA battery cells (2)
- Battery holder
- Electrical tape
- Scissors

The material for this project can buy from sciencestore.pk is also available in Little Scientist STEM Kit 1.0
How to make Electromagnet?
- Take the nails and bind them together using tape.
- Leave 3 inches of copper wire from one end, and start turning on the nail bundle leaving a bit open from both sides.
- Complete twisting of wire around such that it covers the whole bunch.
- Leave the last 3 inches and cover the nail with tape such that two ends are left outside.
- Take off the lamination about 1cm from both ends of copper wire by rubbing with scissors.
- Take off the 1cm lamination from both pieces of connecting wires (both ends).
- Similarly, remove the 1cm lamination coating of the battery holder (both wires).
- Connect one end of both pieces of connecting wires with separate switch terminals.
- Put the batteries in the battery holder
- Join one end of copper wire with any terminal wire of the switch and join another switch wire with that of the battery holder.
- Join other copper wires directly with the battery holder remaining wire.
- Tape all joints so that the connection becomes more secure.
- Switch on your electromagnet and check if it attracting small stuff like paper pins, keys, bobby pins, etc.
Watch Video Tutorial of Electromagnet on Pakistan Science Club YouTube Channel
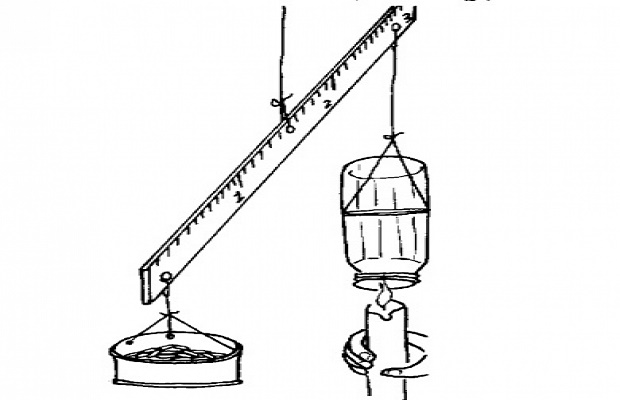
STEM Activity Project # 3 Vibrating Robot
Introduction to Vibrating Robot
The vibrating robot is a fun-filled hands-on activity to understand the basic robot and mechanics involved in it. The project will help participants learn about motion in a machine and its importance.
Material and Tools needed
- Disposable cup
- 3/4 round sticks
- DC motor
- AA battery cells (2)
- Battery holder
- 1 cm glue stick piece
- Switch
- Glue Gun

Note: Material for this project is also available at sciencestore.pk


How to make Vibrating Robot
- Join round sticks equally spaced with a cup using a glue gun so as to make the legs of the robot
- Insert the shaft of the motor into the glue gun piece
- Connect battery holder switch and motor wires in series as shown
- Stick battery holder, motor, and switch at the top with a glue gun as below
- Decorate your robot with anything you like
Few glimpse from Pakistan Science club online STEM Camp

Watch the Video Tutorial on vibrating robot on Pakistan Science Club YouTube Channel
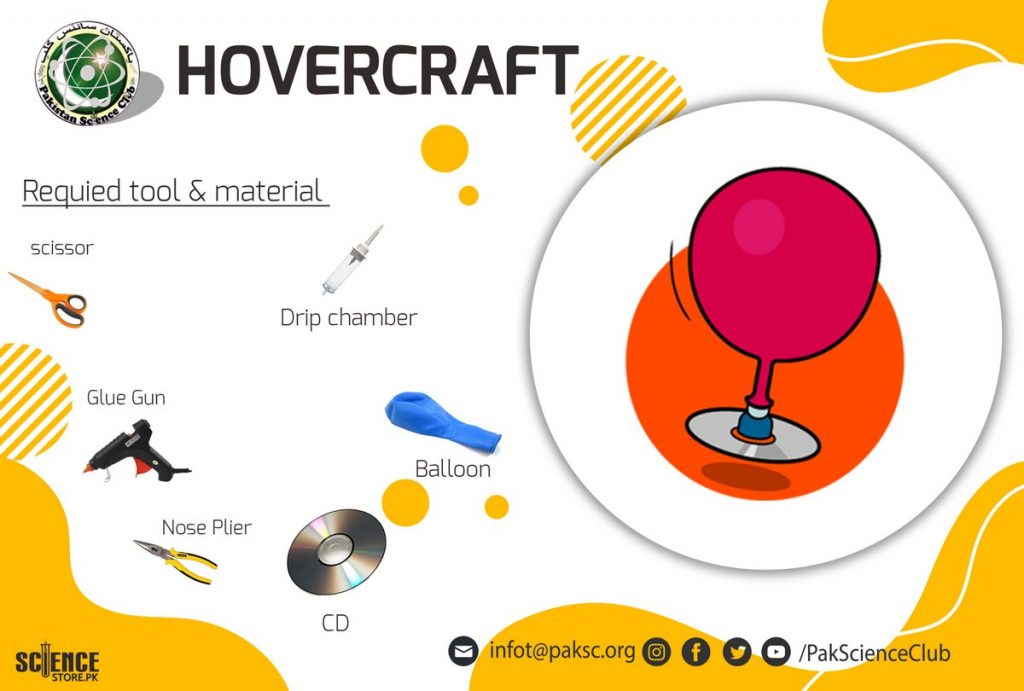
STEM Activity Project # 4 Hovercraft
What is Hovercraft..??
A worth learning hands-on projects to discuss air pressure and fun happenings of it, participants will make their own hovercraft from scratch to play with it
Material and Tools required for Hovercraft
- CD
- Balloon
- Drip pipe (Only Drip chamber and Bag spike)
- Scissors
- Tape
- Hot glue gun
Making of Hovercraft
- Cut the chamber of drip pipe and bag spike as shown
- With the help of scissors, cut the collar of the balloon
- Tape the balloon’s neck on the bag spike end which we cut before
- Using a hot glue gun join the drip pipe chamber at the center of the CD such that there is no leakage and no glue should be on the other side.
- The hovercraft is now ready.
- Inflate the balloon attached and fix it over CD, your hovercraft is all set to go.
Watch Video Tutorial of Hovercraft on Pakistan Science Club YouTube Channel
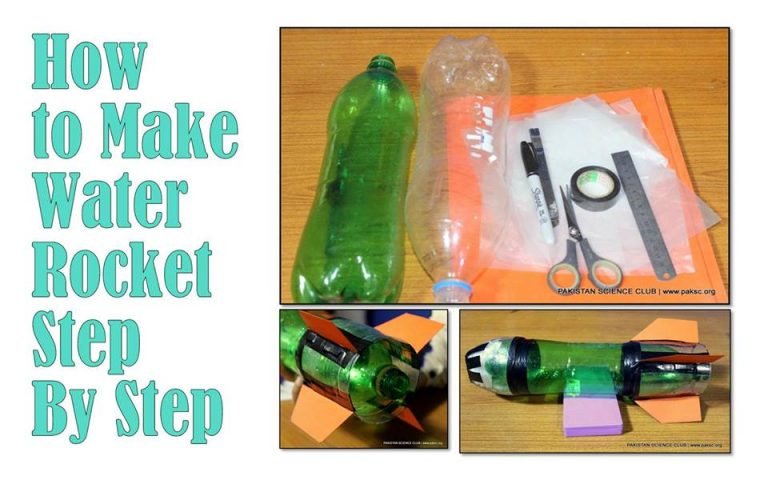
STEM Activity Project # 5 Air Powered Rocket
What is an Air Powered Rocket?
It is among the popular fun-filled concept building STEM activities for kids to explore aerodynamics and its basic principles along with making and launching rockets using air pressure.
Material and Tools required
- A4 paper
- Card stock paper
- 1.5-liter carbonated drink bottle
- 1 fit flexible PVC pipe, 1-inch diameter
- 1 ft plain PVC pipe, 1-inch diameter
- Tape
- Scissors
- Pencil and Scale

Steps of Construction
- Take A4 paper and roll it firmly over plain PVC pipe which shouldn’t be too tight or loose on the pipe.
- Stick the end of the paper with tape and take out the PVC pipe from the paper roll, this is the body of the rocket.
- Using paper stock, make the nose cone of the rocket in a way that fits the rocket body.
- Cut the extra part and fix the cone with the rocket’s body.
- Make 3 rectangles of 3cm width and 7.5cm length on card stock with the help of a pencil and scale, cut these rectangles to make the wings/fins of a rocket.
- Mark 1cm from the width and 3cm on the length of consecutive sides of a rectangle and join the points.
- Similarly, mark this slant on the other two and cut the part.
- Divide the length of the fins into four equal parts and make the cut of 1cm, folding the parts alternatively.
- Stick the fins on the rear end of the body using tape as shown, the rocket is now ready.
- For the Launcher, Join both PVC pipes (plain and flexible) with tape together.
- Join the other end of the flexible pipe with the bottleneck so that there shouldn’t be air leakage.
- The launcher is now ready.
Watch Video Tutorial of Air Powered Rocket on Pakistan Science Club YouTube Channel
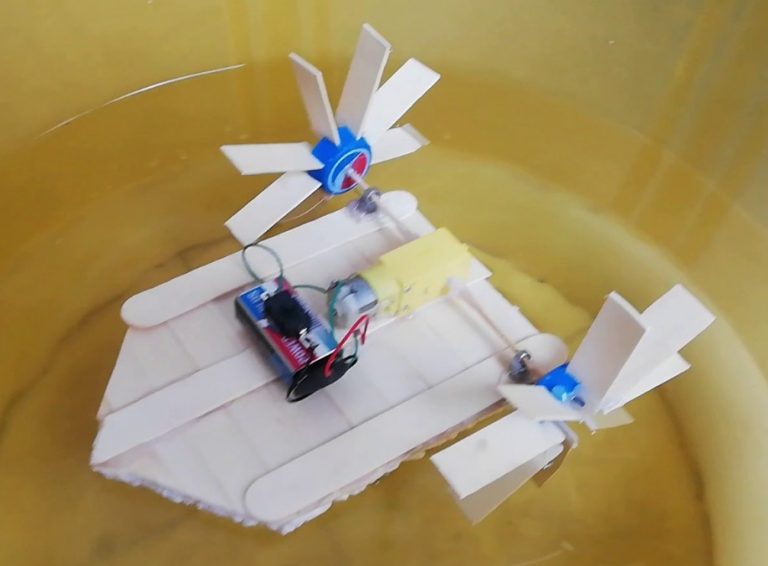
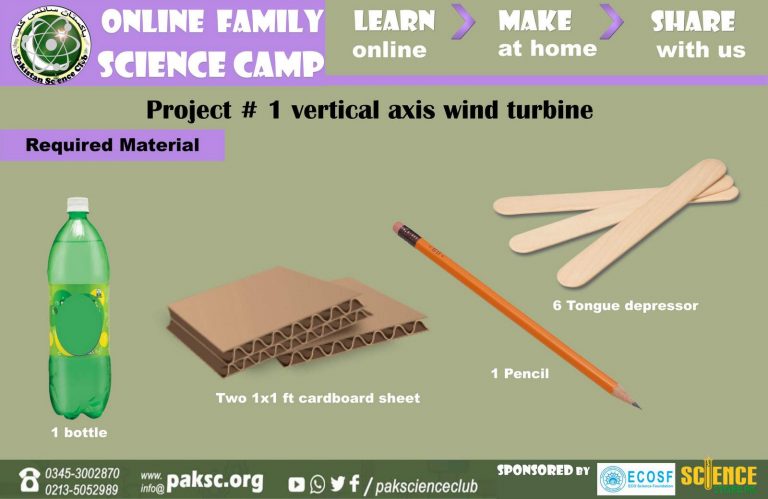
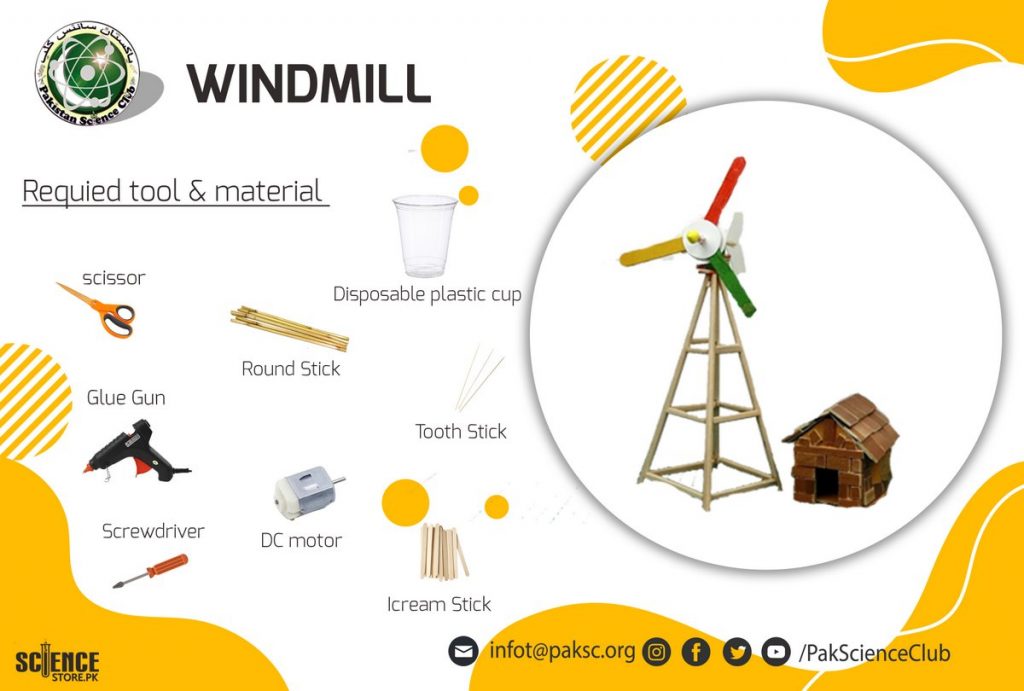
STEM Activity Project # 6 Windmill
Introduction to Windmill
The interesting hands-on activity is to understand energy conversion by making a windmill to turn wind energy into mechanical and electrical energy.
Material and Tools needed to make Windmill
- Round sticks (4)
- Popsicle sticks (6-8)
- DC motor with wires attached to its terminals
- LED
- Disposable cup
- Hot glue gun
- Pointed scissors
Making of Windmill
- Make a hole in the center of two popsicle sticks using pointed scissors in such a way that the motor shaft can pass through them.
- Pass the sticks through the motor shaft, make an X, and join them using a glue gun.
- Cut the disposable cup to make four blades of the windmill as shown below,
- Stick them with a glue gun as follows,
- Make round sticks equal by trimming their ends with scissors.
- Make s stand or tower for windmill blades by using round sticks and popsicle sticks.
- Stick motor with blades at the top of the tower, make sure that blades are not touching the tower while rotating
- Join LED with motor wires and check if it is glowing, in case LED is not glowing swap the connections.
Watch Video Tutorial of Windmill on Pakistan Science Club YouTube Channel
STEM Activity Project # 7 Elastic Shooter
What is an Elastic Shooter?
One of the exciting and fun learning STEM activities for Kids to understand elastic energy, its properties, and conversion from one form to another.
Tools and Materials required
- 4 large popsicle sticks/medical tongue depressor
- 2-3 small popsicle sticks
- 5-6 Rubber band
- Scissors
- Glue gun
Steps to make Elastic shooter
- Take 2 large sticks/medical tongue depressors and make a small groove at the center of only one end on each stick
- Join them together by a rubber band in a way that both grooves are on the same side
- Take other two large sticks/medical tongue depressors and join them with a glue gun on either side as shown below
- Put another rubber band at the tail of the shooter as following
- Now take a small popsicle stick and insert it in between two of the large sticks to make the trigger.
- Put on 2-3 rubber bands to fix the trigger in a way that when it is pulled back, it tries to regain its position as shown in the picture.
- The elastic shooter is now ready, fix the rubber band in groove and trigger, you are ready to launch now.
Watch Video Tutorial of Elastic Shooter on Pakistan Science Club YouTube Channel
STEM Activity Project # 8 Hydraulic Excavator
What is a Hydraulic Excavator?
Hydraulics is one of the exciting fields of study to learn about mechanisms operating with hydraulic (water with air) pressure, this project will help to learn about Pascal’s principle and its applications.
Tools and Materials required
- Excavator Kit
- Glue gun
- Scissors
- Water

How to make Hydraulic Excavator
- Follow the steps to assemble the kit as shown in the video.
- If any part is loose, put some glue gun to fix it
- The syringes must be attached firmly to their respective places, bind them first with cable ties, and then apply glue gun to fix them securely.
- You might need to remove the air bubble from syringes after adding water to make them work properly.