AC Generator, Simple DIY project with Step by Step instructions
Introduction
AC generator discusses the conversion of mechanical energy (kinetic energy) into electrical energy by using magnetic induction and emf. It focuses on the working principles and components used in it. The interchange of different energies and electricity generation by the process of induction can be completely explained by AC generator.Material required:
For construction of Electric Generator you need following things and tools.- Supper Glue (Elfi) 20 ml
- Paper Tape
- Iron Strips 2
- 1/5'" PVC Pipe
- 6" long Iron Nail
- LED's
- Copper Wire 30 to 34 gauge
- 4 Magnets
- 6'' wooden Piece
Tools:
Diagrams of AC Generator parts
1 The Stator
The stator is made of 2.5 inch long 10 iron strips joint together with paper tape and have copper winding on it.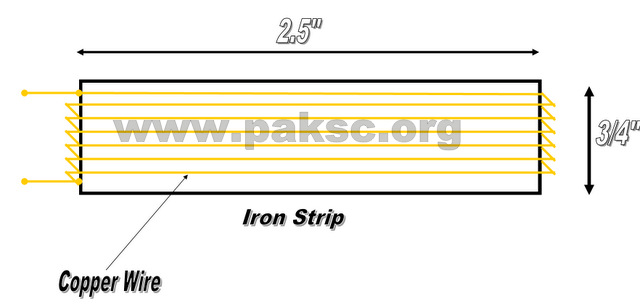
Copper coil winding
2 The Rotor:
Rotor is made by using a piece of PVC pipe, 4 magnets and iron nail.
AC (Alternating current) Generator Rotor side view

AC (Alternating current) Generator Rotor front view

AC (Alternating current) Electric Generator
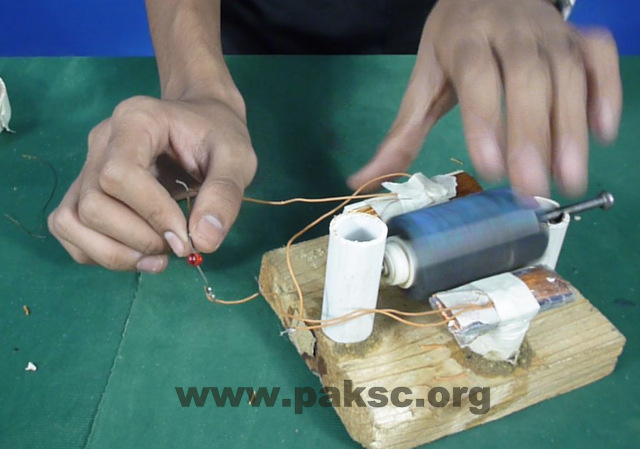
AC electric Generator in action

Habab Idrees Pakistan Science Club's Host
Steps of Construction
Making of Coil
- Measure 2 ½ inch of iron strip and cut 10 equal parts of it.
- Firmly hold and pile all parts together using paper tape in a way that there should be no space between strips.
- Wound approximately 300 turns of copper wire around the bundle of strip vertically. Wrap paper tape around it so it will not get unwound.
- We need two such coils to make an AC generator.
Making of Rotor
- Take half inch diameter PVC pipe and cut a piece of 2 ½ inches
- Stick 4 bar magnets on the piece of pipe with the help of super glue
- Make sure the same pole of magnets must be in alternative manner. It will be in the order of North-South-North-South.
- Check out the poles of magnets if they are aligned right by using another magnet.
Axle making
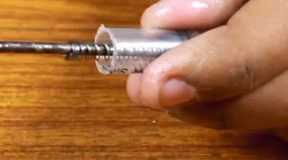
- Make an axle using 6” long iron nail.
- Leave half inch from the tail of nail and mark the length of magnetic rotor.
- Wrap paper tape on the nail in a way that the magnetic rotor get fix on it.
Body of the Generator
- Take 6×6" wooden piece and two pieces of PVC pipes (one is of 2" and the other is should be of 1").
- Make vertical groove on the 1 inch PVC pipe.
- Align it with 2 inches piece and make a hole in it.
- Fix the axle through both PVC pipes and check if it is perfectly leveled.
- Stick the PVC pipes on the wooden base with the help of super glue.
- Make 2 more coils as previously discussed leaving both of their terminals outside the tape.
- Cut 2 pieces of PVC pipes measuring half inch.
- Join the pieces perpendicular to the axle (one at each side) at the base.
- Fix coil on each of the PVC pipe.
- Burn the coating of coils at the terminals using lighter.
Testing
- Join the LED with the coil and rotate the nail, the LED will glow.
- If both the coils are connected in series then LED will glow brighter.
Watch Video
- Presenter: Habab Idrees
- Project Design: Abdul Rauf
- Translator: Erum Habib
See Also
- Build Your Own Simple DC Motor
- DIY Project: How to build a mini wind turbine
- DIY water Feeder for wild bird from pet bottle
- Water rocket building Process
- Making of Water Rocket
- Magnetic Levitation Science Project
- AC generator "Permanent magnet alternator" from old Harddisk drive magnets




7 Comments
waseem
(April 21, 2021 - 6:31 am)good effort
SHERDIL
(January 5, 2020 - 1:00 pm)HOW MUCH VOLTS IS IT PRODUCING
Abdul Rauf
(November 6, 2017 - 3:41 am)you can get from https://sciencestore.pk
syed mohd talha
(May 20, 2017 - 5:43 pm)Can u please tell me where u got these magnets ?
sena sazcı
(March 28, 2016 - 8:11 pm)Are these two coils same? Because it’s looks like one of the coils isn’t covered with paper tape.
yadav shivam
(July 27, 2015 - 12:43 pm)what is the dimension of the magnets used in this electric generator
Abdul Rauf
(December 5, 2015 - 5:17 pm)0.5X2X6 cm